


Solutions

Markets
References
Company
Profile
Partners
Contact

12. September 2018
Creating a multi-arch Docker image with Azure DevOps
Microsoft has rebranded and extended their SaaS ALM offering Visual Studio Team Services (VSTS) to Azure DevOps. I usually had an eye on what is happening with VSTS but as we are using an on-prem Team Foundation Server, I mostly don’t have the hands-on experience, so this relaunch was a good reason do really dig into it again and I have to say, I am really impressed. I have previously shared my tool to ex- and import MS Planner plans using the MS Graph API and I already had this as a Windows Docker image and even a CI/CD pipeline using AppVeyor. As Microsoft now allows free unlimited builds for public projects, I decided to switch to Azure DevOps and also try to make the Docker image multi-arch as Azure DevOps offers Linux and Windows based build agents.
The TL;DR
Azure DevOps pipelines work as easy and straightforward as advertised, including a seamless integration with GitHub, so the “plumbing” and making sure that my existing stuff also worked on Azure DevOps was done very quickly. In a second step I duplicated my Dockerfile and pipeline YAML description to have a Windows and a Linux version, which also went quite well. I then decided to try to integrate both into one Dockerfile and one pipeline and there I had a bit more trouble to get it up and running, but now it works: In the end I have two Docker images that can be pulled and run with the same name on Windows and Linux
A bit of background: Azure DevOps pipelines and multi-arch Docker images
With the launch of Azure DevOps there is a lot of information coming from Microsoft and the ecosystem around the offerings, including pipelines. Therefore I’ll only give you the briefest idea: Azure DevOps pipelines are what used to be VSTS / TFS build and release. If you aren’t familiar with that as well, it allows you to implement automated build, test and release of software artifacts, so it basically automates the way from source code to running application through the various stages you might have. If you want to learn more, this is a very good starting point. And if you want to dig deeper, as really has become the standard for Microsoft products, the online help is very good as well.
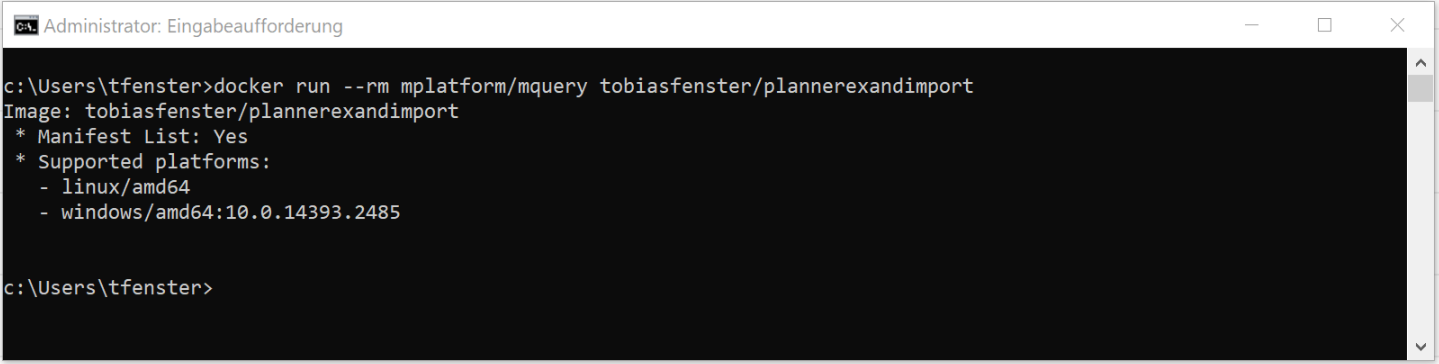
Multi-arch Docker images are a way to have from a usage perspective a single Docker image that works on multiple platforms like Linux/amd64, Windows, Linux/arm etc. In the background you actually have one image for every platform, but a so called manifest holds the information which image works on which platform and you only need to address the manifest when doing docker run or docker pull. Docker will then figure out the right image for you. That means that with a multi-arch image you don’t have to worry about finding the right image for your platform, but just can use the same docker run command on all platforms as you can see in the example above. The definitive source for that topic is Phil Estes with the “official launch” blog post here. He also provides a tool (obviously in a container 🙂 ) to query images for their multi-arch capabilities which in my case returns the following:
How does it work: One Azure DevOps pipeline and one Dockerfile for a multi-arch Docker image
Again, the Azure DevOps pipelines are as easy to use as advertised. I started with installing the GitHub integration as my source code is on GitHub in this case and with only a couple of clicks I had a nice pipeline which was able to build my Windows Docker image as I only had a Windows Dockerfile at that time. It even created a YAML file describing that pipeline for me which it automatically added in my GitHub repo, so I had something like infrastructure as code1, which means that you can version control your infrastructure.
I won’t bore you with my journey and just show you the end result with a couple of comments: My pipeline in the end consist of two files, one template for the build jobs (Linux and Windows) and the pipeline itself. The pipeline file azure-pipelines.yml only references the template and sets parameters where the build jobs differ (lines 4-7 and 11-14). Those parameters define the os, the vm image used for building and which variants of the dotnet sdk and runtime images to use for building and running the application. The last job “manifest” (lines 16-29) creates (line 24) and then pushes (line 25) a multi-arch manifest with the tag latest which contains the two images with tag linux and windows.
jobs:
- template: azure-pipelines.jobtemplate.yml
  parameters:
    os: linux
    vmImage: 'Ubuntu 16.04'
    sdk: '2.1-sdk-alpine'
    runtime: '2.1-runtime-alpine'

- template: azure-pipelines.jobtemplate.yml
  parameters:
    os: windows
    vmImage: 'VS2017-Win2016'
    sdk: '2.1-sdk-nanoserver-sac2016'
    runtime: '2.1-runtime-nanoserver-sac2016'

- job: manifest
  pool:
    vmImage: 'Ubuntu 16.04'
  steps:
  - bash: |
     mkdir -p ~/.docker
     echo '{ "experimental": "enabled" }' > ~/.docker/config.json
     docker login -u $(docker_user) -p $(docker_pwd)
     docker --config ~/.docker manifest create tobiasfenster/plannerexandimport:latest tobiasfenster/plannerexandimport:linux tobiasfenster/plannerexandimport:windows
     docker --config ~/.docker manifest push tobiasfenster/plannerexandimport:latest
    displayName: 'Create Manifest'
  dependsOn:
  - linux
  - windows
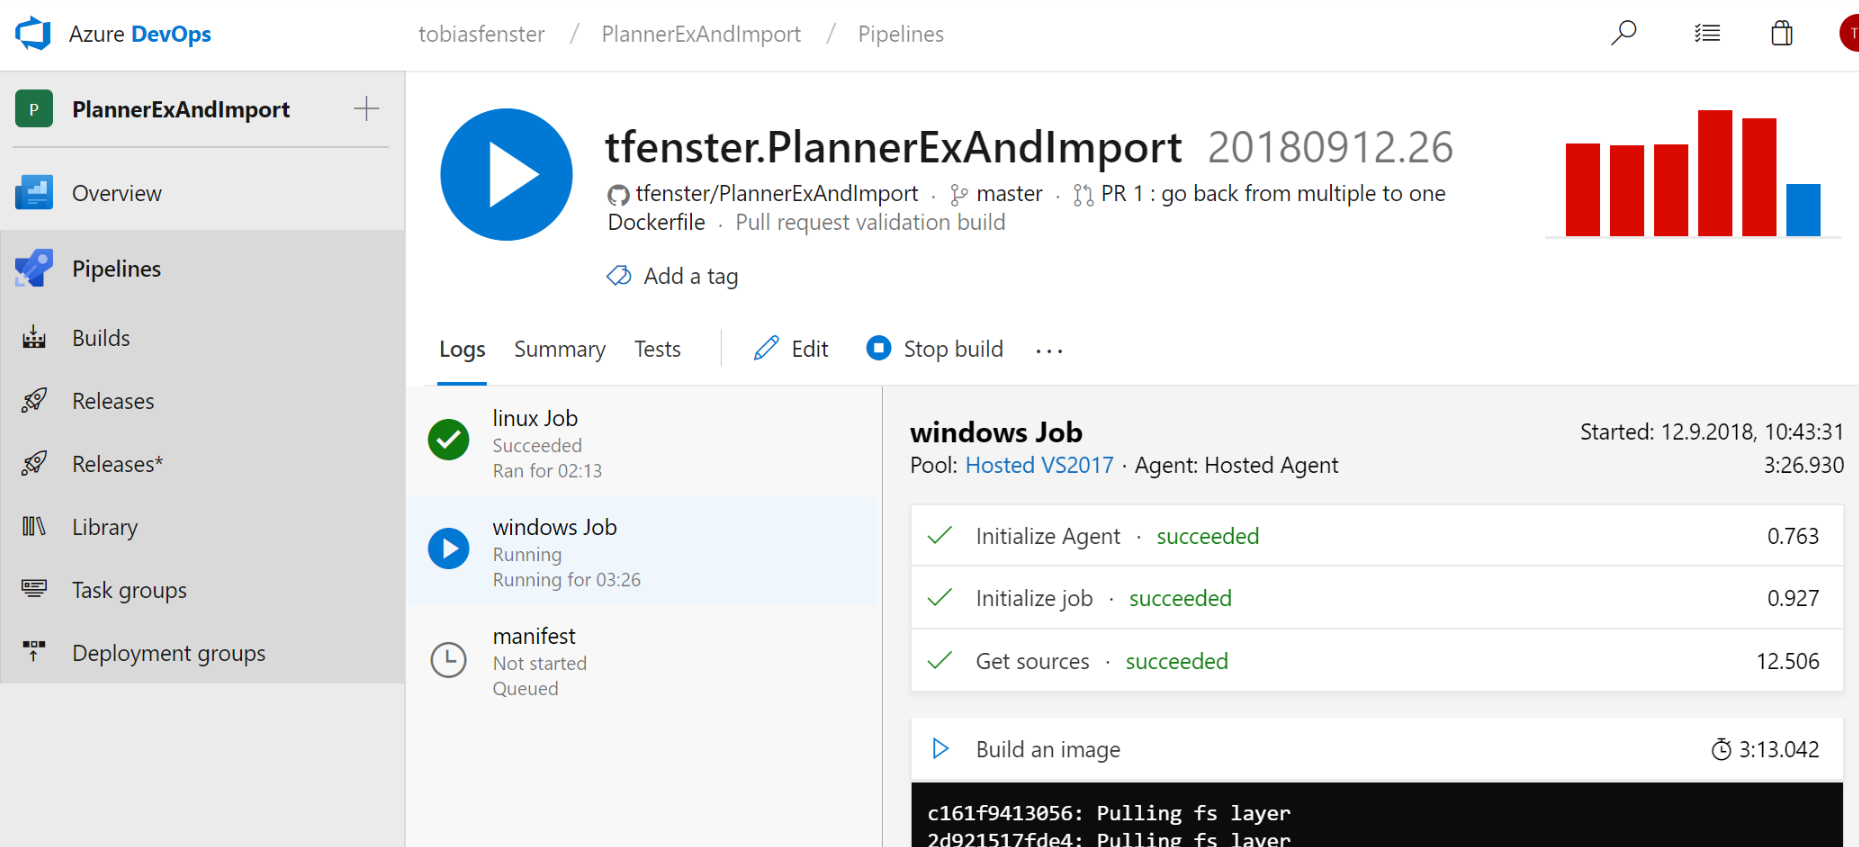
Some additional notes about the manifest step: Lines 21 and 22 are necessary because docker manifest is currently only available if you enable experimental client features. The login in line 23 is necessary because in line 25 the manifest gets pushed to the docker hub in my repository. As you will see in the next step, there is also a dedicated login docker login task which I would have preferred here as well as it can reuse an existing connection and doesn’t rely on variables with the docker username and password, but for whatever reason the login didn’t persist to the bash step for me. I’ve also added the config directory as param in lines 24 and 25 although I am using the default .docker folder but omitting it didn’t work for me as well. You also see the dependsOn-part in lines 27-29 which causes the manifest job to wait for both the linux and the windows job to finish so that both specific images are created and pushed before the manifest is created and pushed. You can see below how linux is finished and windows is running (both started parallel but windows takes a bit longer as the nanoserver base image is way bigger than the alpine linux base image), but manifest is waiting until both are finished
Lines 2 and 9 reference the template file azure-pipelines.jobtemplate.yml defining the actual build job which looks like this:
parameters:
  os: ''
  vmImage: ''
  sdk: ''
  runtime: ''

jobs:
- job: ${{ parameters.os }}
  pool:
    vmImage: ${{ parameters.vmImage }}
  variables:
    imageName: ${{ format('plannerexandimport:{0}', parameters.os) }}
    dockerId: 'tobiasfenster'
  steps:
  - task: Docker@1
    displayName: 'Build an image'
    inputs:
      arguments: ${{ format('--build-arg SDK={0} --build-arg RUNTIME={1}', parameters.sdk, parameters.runtime) }}
      imageName: '$(dockerId)/$(imageName)'
  - task: Docker@1
    displayName: Login
    inputs:
      command: login
      containerregistrytype: 'Container Registry'
      dockerRegistryEndpoint: 'docker_hub_connection'
  - task: Docker@1
    displayName: 'Push an image'
    inputs:
      command: 'push'
      imageName: '$(dockerId)/$(imageName)'
After declaring the parameters, the template defines which pool of agents to use (lines 9/10) enabling a differentiation between Linux and Windows and which steps to take during the build. Those steps are:
- Building the image (lines 15-19). We’ll see next how the Dockerfile uses ARG parameters (see here for more details) and we have to provide the values for those parameters which happens in line 18. Those
${{ }}parts are called template expressions and allow dynamic values during runtime. In this case it is not simply a variable, but the functionformatis used to concatenate strings (again, see here for details). - Login to the Docker hub (lines 20-25). This references a pre-existing connection
docker_hub_connectionin line 25 where username and password can be stored and managed for multiple pipelines at once - Pushing the image (lines 26-30). This pushes the specific Linux and Windows images to the docker hub. Because the image name got a tag including the OS name in line 12 this results in
plannerexandimport:linuxas well asplannerexandimport:windowsbeing pushed. You can see the result here. Note that you also find an imageplannerexandimport:latestwhich is the result of the manifest job above.
Now for the Dockerfile:
ARG SDK
ARG RUNTIME
FROM microsoft/dotnet:$SDK AS build
WORKDIR /app

COPY PlannerExAndImport.csproj .
RUN dotnet restore

COPY *.cs ./
COPY JSON/. ./JSON
RUN dotnet build
RUN dotnet publish -c Release

FROM microsoft/dotnet:$RUNTIME AS runtime
WORKDIR /app
COPY --from=build /app/bin/Release/netcoreapp2.1/publish/. ./
You see two stages (lines 1-12 and 14-16) as this is not only a multi-arch but also a multi-stage image. I have blogged about how multi-stage images work and why you might want to use them here. What makes this work as multi-arch image are the ARG params (lines 1 and 2, usage in lines 3 and 14). Those are set with the --build-arg params in azure-pipelines.jobtemplate.yml (line 18) which are in turn provided as params in azure-pipelines.yml (lines 6/7 and 13/14). Therefore this is always using the base images microsoft/dotnet, but for the Linux part it uses microsoft/dotnet:2.1-sdk-alpine for building and microsoft/dotnet:2.1-runtime-alpine for running and for the Windows part it uses microsoft/dotnet:2.1-sdk-nanoserver-sac2016 for building and microsoft/dotnet:2.1-runtime-nanoserver-sac2016 for running. The rest of the Dockerfile is standard dotnet restore, build and publish2.
With that, everything is in place: A single Azure DevOps pipeline where Windows and Linux builds run parallel before the manifest is created and pushed and a single Dockerfile that takes ARG build params to use the right base images.
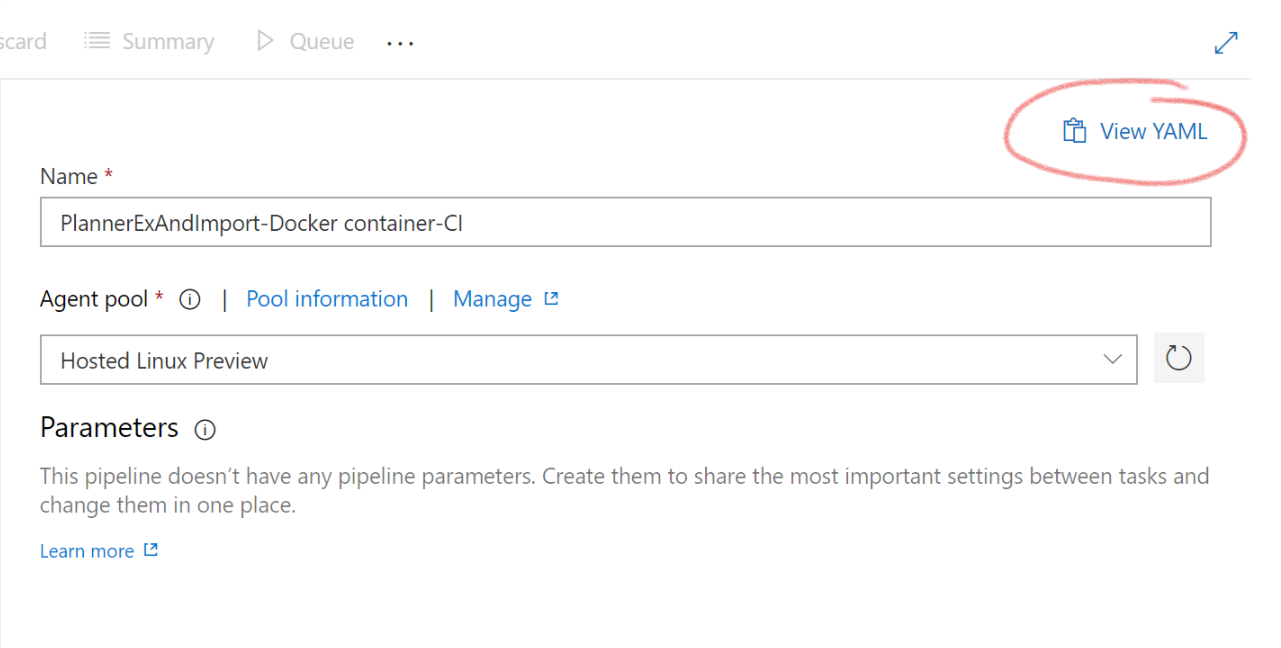
One last hint: If you are implementing your YAML-based pipelines and are wondering about the exact syntax, you can just use the GUI and hit “View YAML”. This gives you the YAML representation of your current GUI and helps a lot to find out how the tasks work. Be careful to chose the same task version in the GUI that you reference in the YAML file or you will really start to wonder3.
You can find the pipeline here, including an impressive number of failing builds until I got it right and the source code including the YAML files is still here. As always, I am open for PRs and discussions!
- which has become somewhat of a buzzword lately and even might be included on some bullshit bingo tables, so I really had to mention it here ;)
- which actually is still absolutely amazing but because it is around and working for quite some time now, I tend to take it for granted until I sometimes take a step back and remember the state of affairs a couple of years back. Dotnet core definitely has come a long way
- no, this absolutely didn’t happen to me and I didn’t spend about 3h hunting for my bug until I noticed that I had version 0 in the GUI and version 1 in YAML. No way :)
RSS Feed
Contact
Contact
